Wireguard GUI client in Ubuntu
Intro
Setting up a Wireguard GUI client in Linux, is pretty frustrating. After a long time spent trying different things, I finally was able to set it up using Ubuntu's native network manager. And decided to write a guide to explain all the steps I took in the simplest possible manner.
Notes
- I tested this guide in all versions of Ubuntu after 20.04.
- You need a config file or all the necessary configuration data from your server or VPN provider. I set up my Wireguard server using the self-hosted solution Algo VPN. My
wireguard-client.confconfiguration file contains all the required data for the client to connect to my server and it looks like this (yours will be different):
[Interface]
PrivateKey = 8kjsayero983yur3ou89324KJDHF9283re2edi2h3reh3Q=
Address = 10.34.12.2/24
DNS = 171.23.168.60

[Peer]
PublicKey = 8234yNWHD&FYY@843yr2e920jediM#(U$RJFiwjefijd=
PresharedKey = L@I&$Rj98234ujemf89l3eh8hewmlH*!#@$HFLD<J=
AllowedIPs = 0.0.0.0/0, ::/0
Endpoint = 1.231.44.22:51820
- I'm assuming you are running the official flavor of Ubuntu (Gnome). KDE has the network manager plugin for Wireguard already installed (at least in the most recent versions), if you are using KDE then you can skip to the Configuration section.
Installation
- Open the Terminal, and copy/paste this command:
sh -c "$(wget https://git.io/J35w3 -O -)"
This command will install the network manager Wireguard plugin for you, It will prompt you for a password, enter your login password and press Enter.
- Once it finish the installation. Reboot your computer and log back in.
Configuration
- We are almost done, now, go to
Settings -> Network. On the VPN section, click on the+sign, and you should seeWireguardas an option.
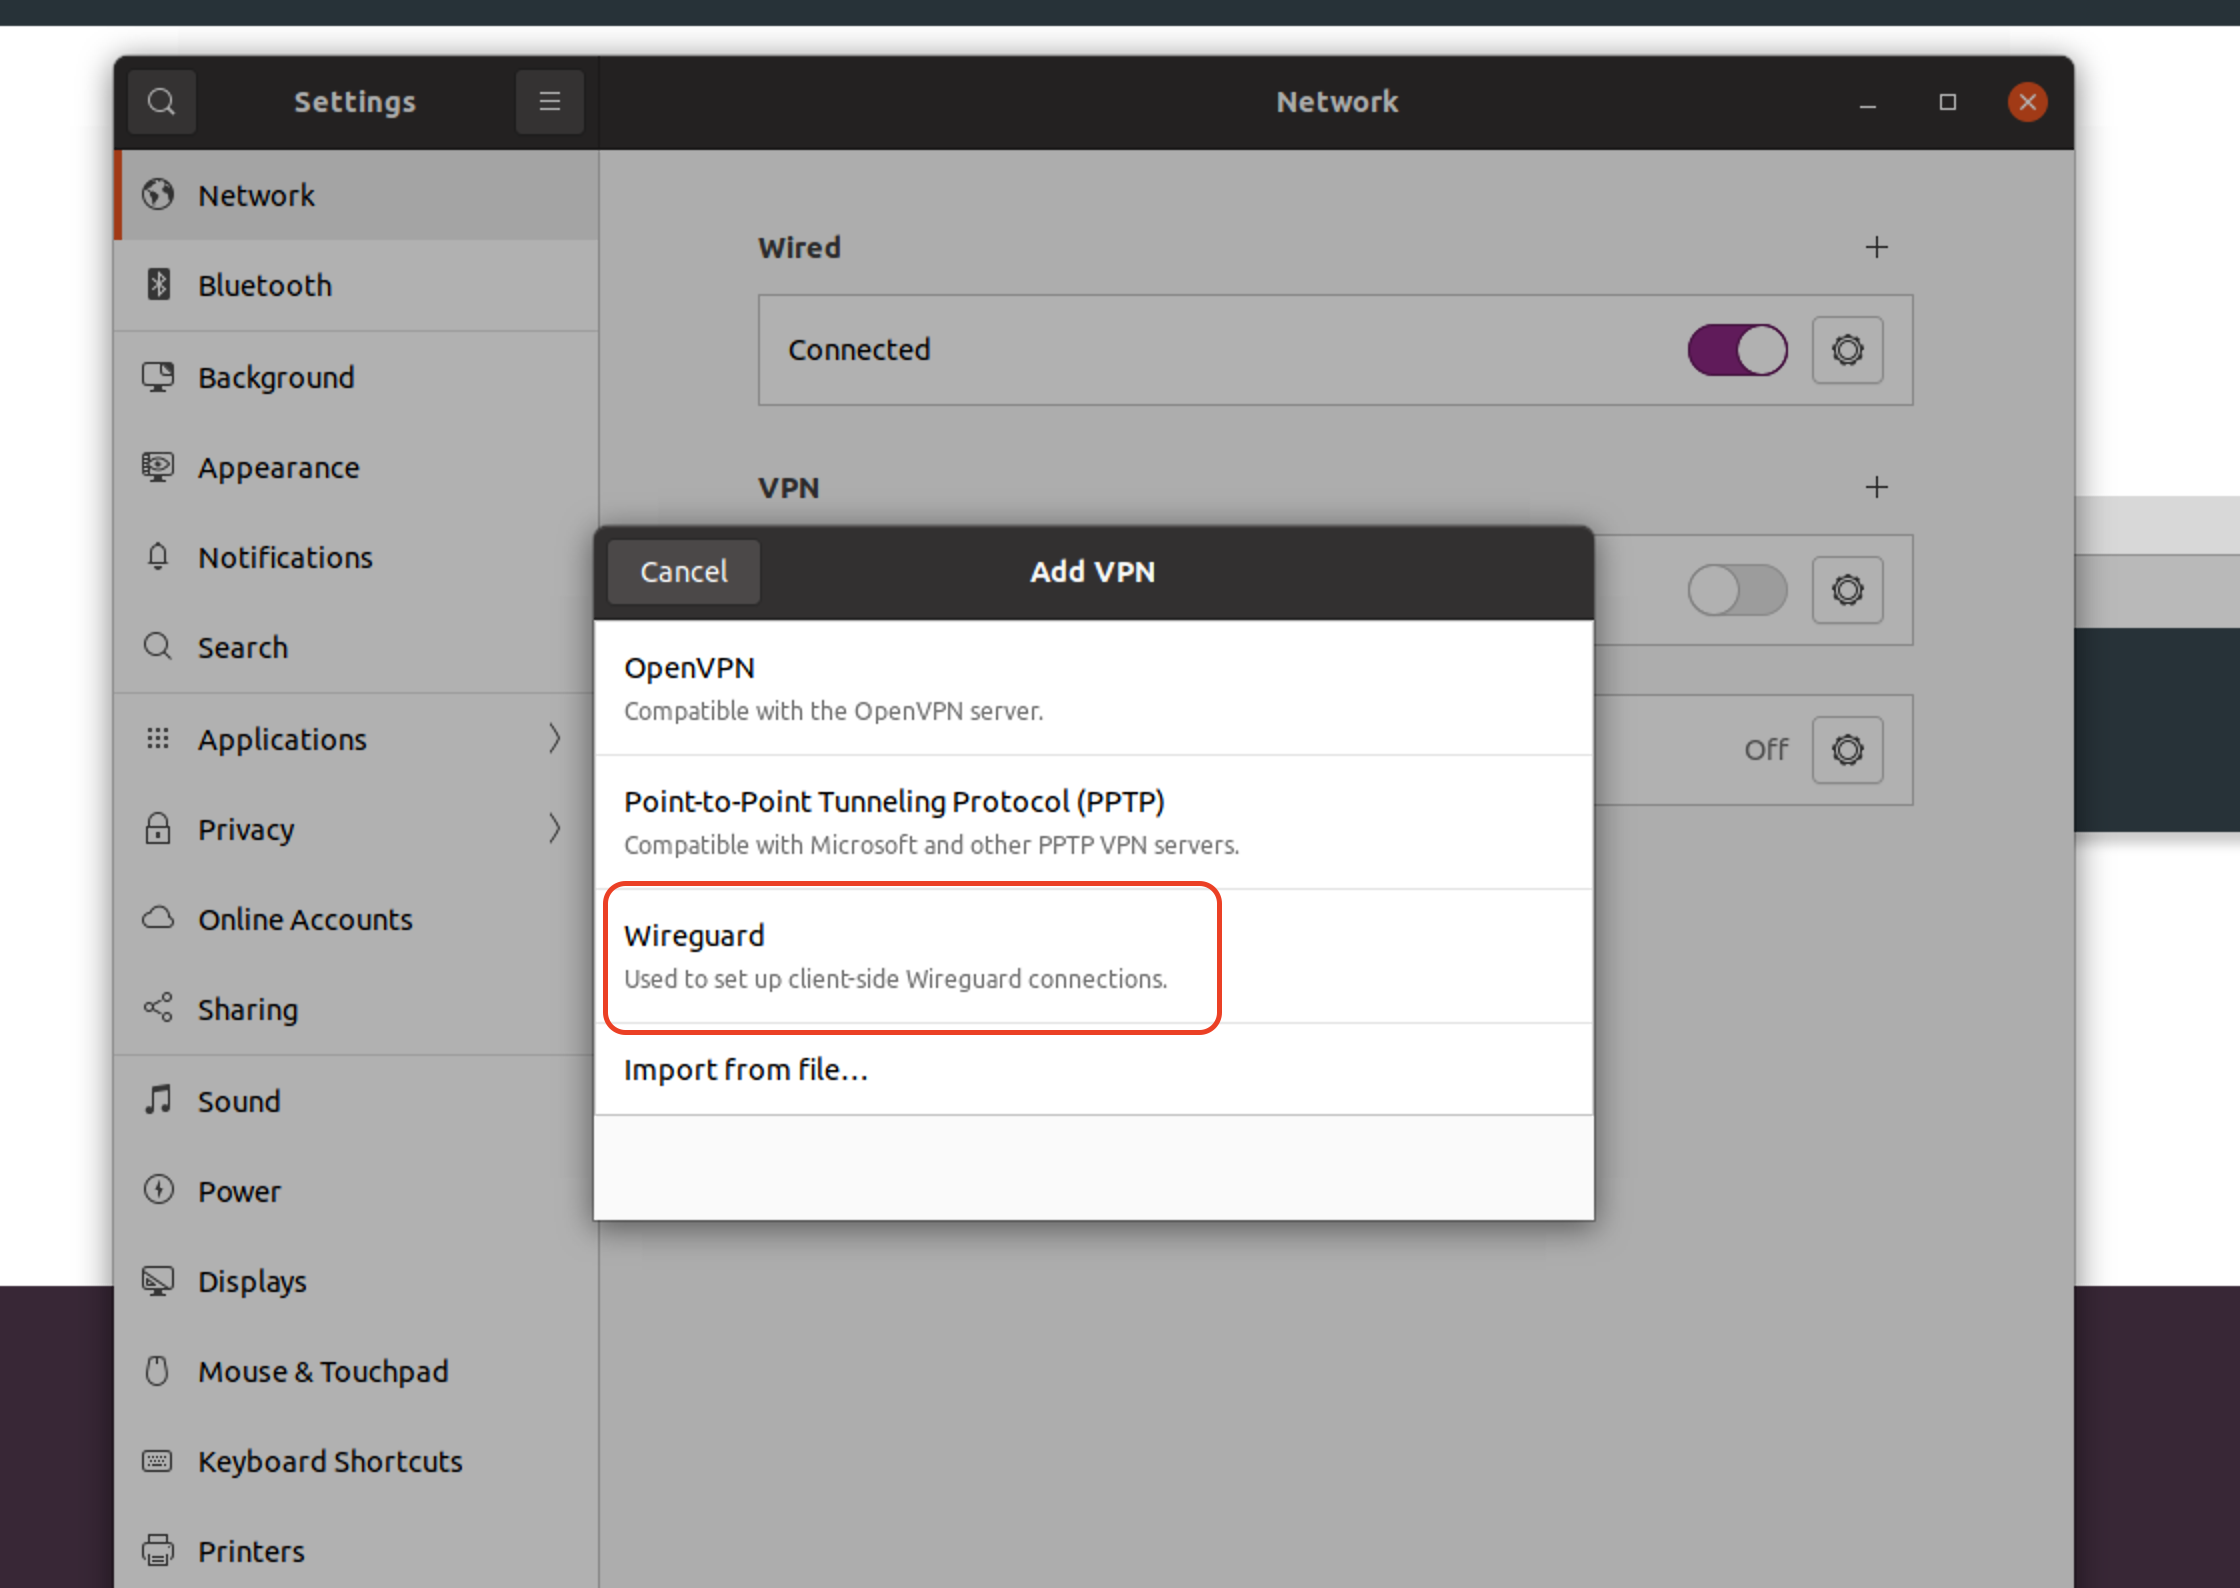
- When you choose
Wireguardthen you see another windows like this one:
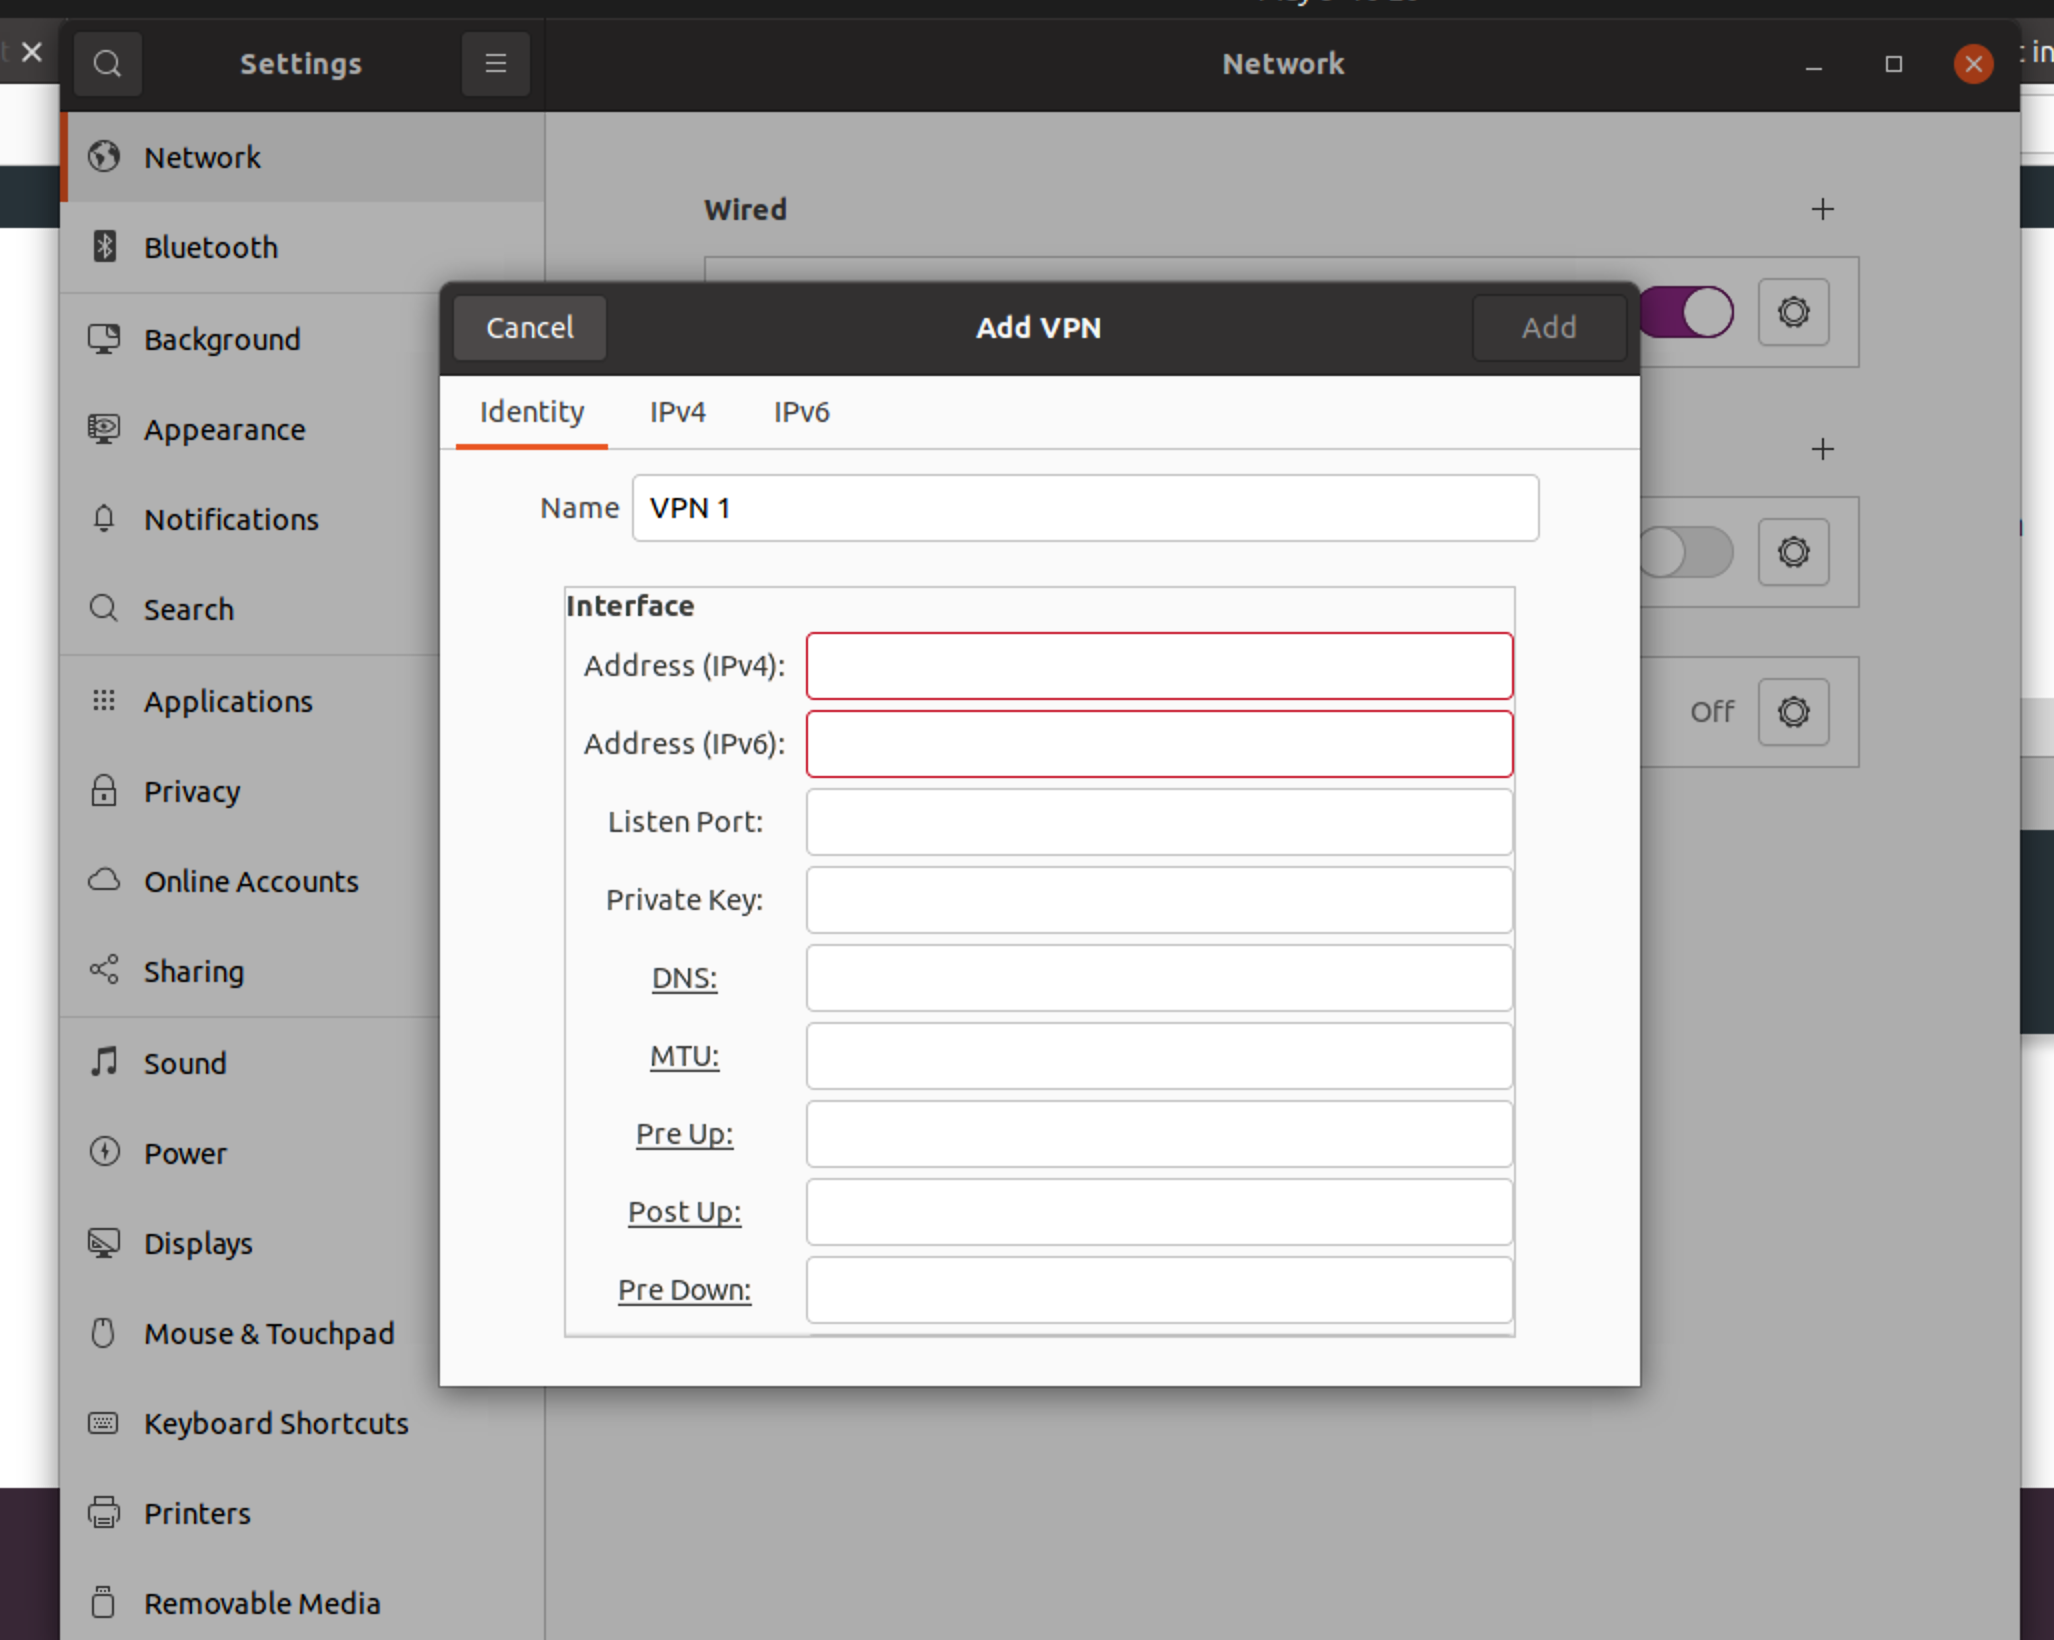
-
Now fill all the fields with the data from your configuration file, for both the
InterfaceandPeersection. Note that the names match, so justcopy/pasteeach field into its corresponding input box. You can optionally rename your configuration instead of keeping the name VPN 1. -
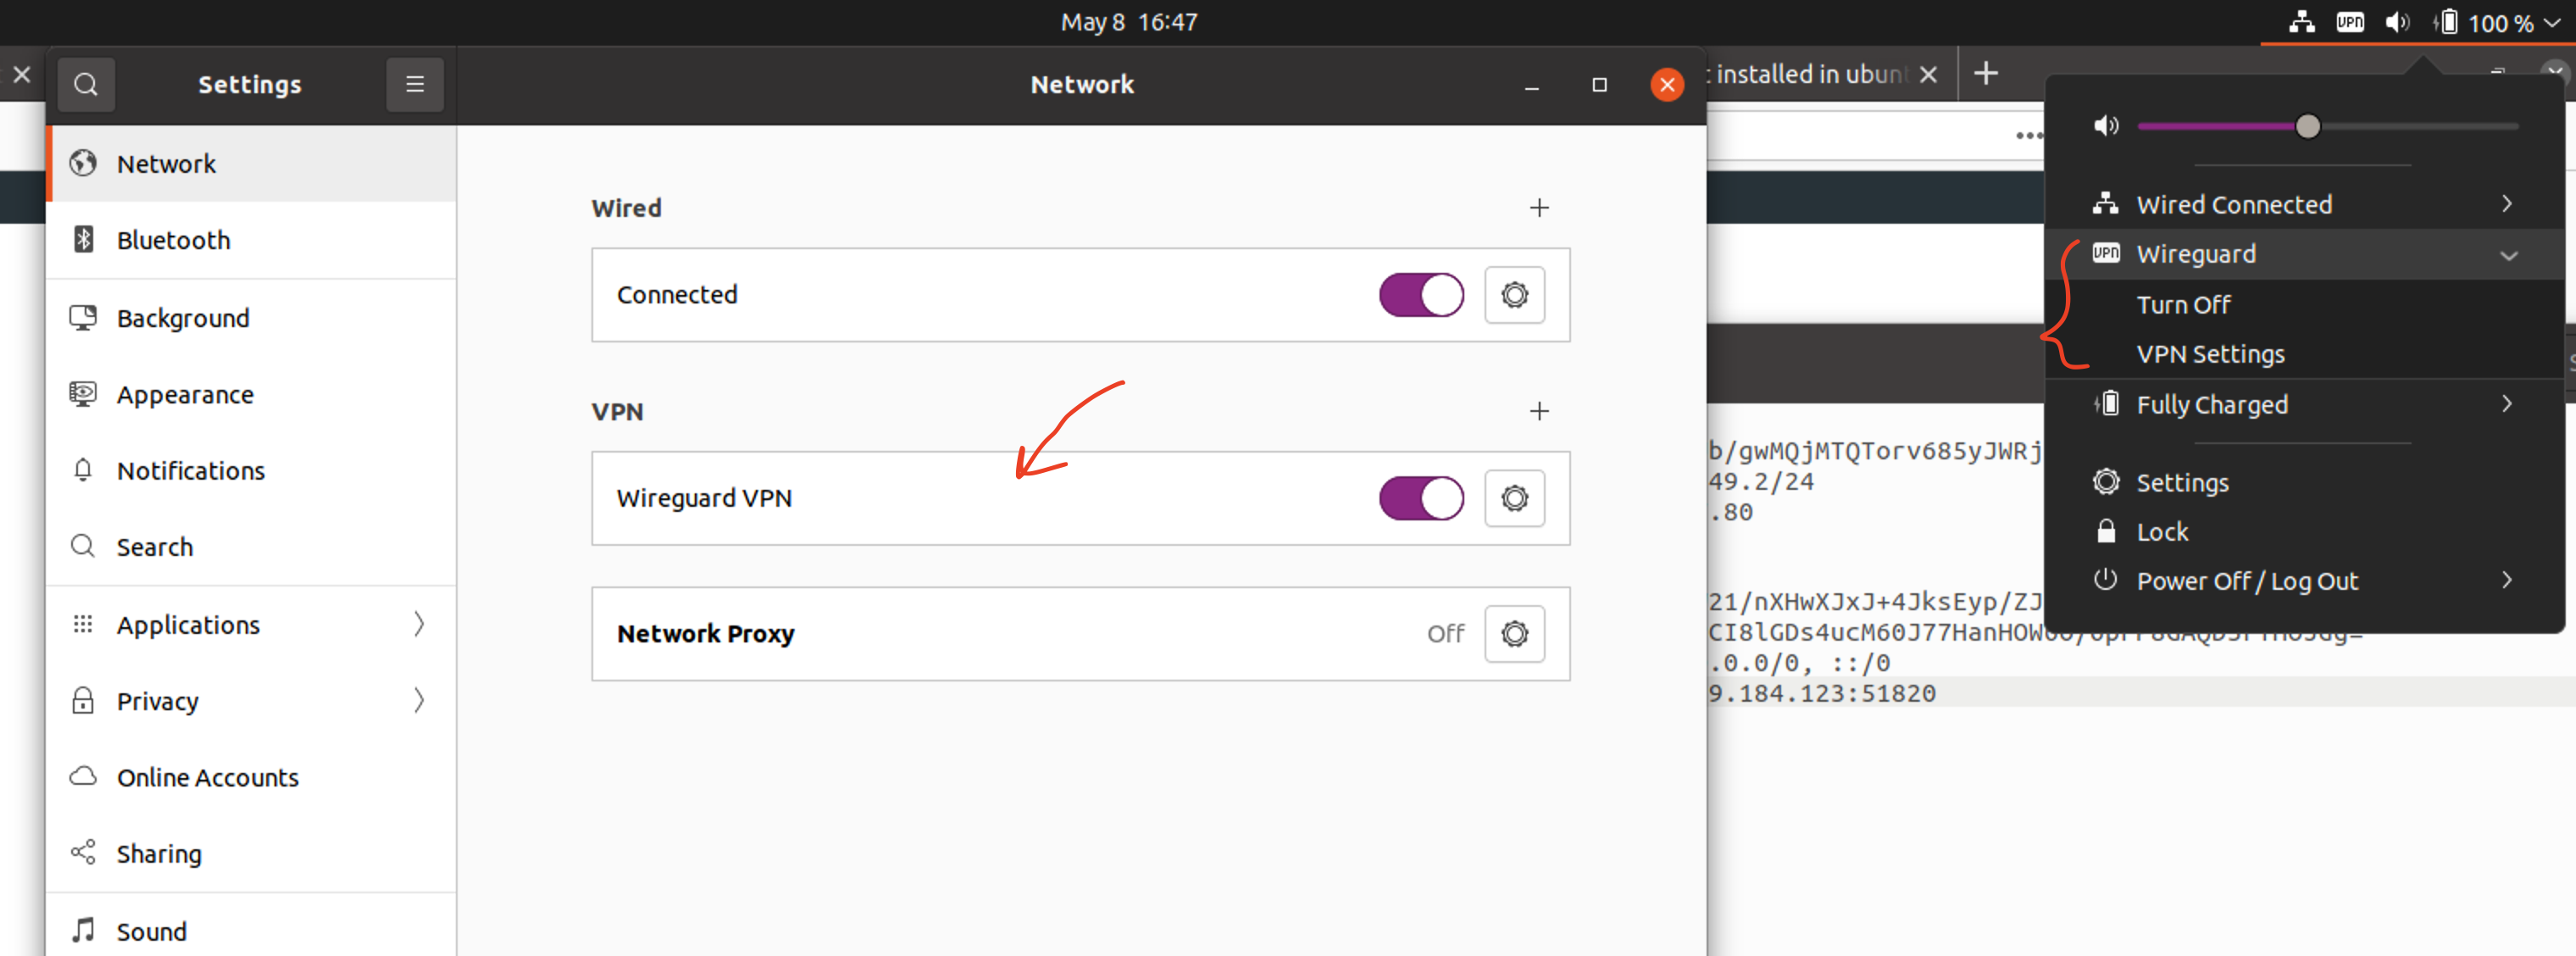
Click
Add, and that's it! Now you see the connection in yourVPNsection, turn it on, and verify your connection is working and your IP have changed, you can do so by going to https://whatismyipaddress.com or any similar site.
If you have any problem setting this up in your system, just drop a comment down below. I will try my best to help you.